| Use Git, GitHub, and GitHub Classroom | Prof. Bartenstein |
We will be using Github to submit your labs and assignments throughout this course. You will need a Github account, so if you don't have one already, go to Github and sign up.
Once you have signed up for an account, it is important that you communicate the GitHub name to the teaching staff so they will be able to associate a GitHub name with a specific student. Check with the instructions for the class for details on how to do this.
One other thing you probably want to do once you get your GitHub user account is to set your global user name and email. This only needs to be done once, and can be accomplished by:
  git config --global user.name "your name"
  git config --global user.email bmail_id@binghamton.edu
For more detail on your username/email address, see Alvin Alexander: How to show or change your Git username or email address
arrow_circle_upIn order to use GitHub Classroom, GitHub has started to require two factor authentication instead of just a simple username and password to get logged on to GitHub. There are two relatively simple ways to accomplish two factor authentication. To enable two factor authentication, first edit your profile (right click on your icon in the upper right corner, and select "Your Profile"). Then, find the "Password and authentication" button under "Access" in the leftmost column, and scroll down to "Two-factor authentication".
I found the simplest method was by selecting "Authenticator App" as my Primary two-factor method. I was then able (and I've forgotten all the details) to set "Authy" as my authenticator app. (I've got Authy installed on my smart phone for Binghamton University access anyway.) Once configured, then I need to occasionally (maybe once a week at most) enter the six digit number produced by Authy, but usually I'm able to get into git right away with no login at all. (See also GitHub: Credentials)
An alternative is to generate a "security key". You can follow the instructions to generate a security key which you must use instead of your password when GitHub prompts for your password. When you generate your security key, copy it to somewhere safe so that the next time you need to log in to git, you can cut and paste your security key (but where no-one else can get at it.)
See also GitHub Docs: About two-factor authentication.
arrow_circle_upWhen you use GitHub, you need to provide your GitHub userid and password. Many web browsers such as the Google Chrome web browser remember your GitHub userid and password for you. (If you have multiple GitHub accounts, this can become confusing, so it's easiest to use just one account.) Integrated Development Environments such as Eclipse can also often save your GitHub userid and password for you. On Windows, the later versions of Git-Bash include a Git Credential Manager that can save your git userid and password and provide it to Git whenever it needs it. Once installed, the first command line use creates a pop-up that allows you to connect to git using web browser authentication. After then, the credential manager remembers your git userid and password, and you do not need to specify it again. (I'm not sure how Git credentials are managed on Mac, but a similar capability exists.)
One other hint... some users have had problems until they went to GitHub and creates a "Personal Access Token". For more information about personal access tokens, see GitHub: Creating a personal access token.
arrow_circle_upThe Professor will create a GitHub Classroom assignment for each homework assignment or lab, and provide the invitation URL for that assignment to you. If you want to try things out, here is a test invitation link(It's probably easiest to right click, and select "Open link in a new tab" so you can flip back to these instructions.)
When you navigate to the invitation link for the first time, GitHub Classroom will ask you if you wish to accept the invitation. When you answer "Yes", then GitHub Classroom will automatically create a private repository for you, initialized with any template code or instructions the Professor has provided. The repository name will start with whatever prefix the Professor has specified (usually "lab01" or "hw01" and so on), followed by a dash, followed by your Git userid. For instance, if you accept the test invitation above, you will get a repository called "test-userid", where userid is your Git userid.
If you navigate to the invitation link after you have accepted the invitation, GitHub Classroom will give you a hyperlink to your version of the repository instead of asking you to accept again.
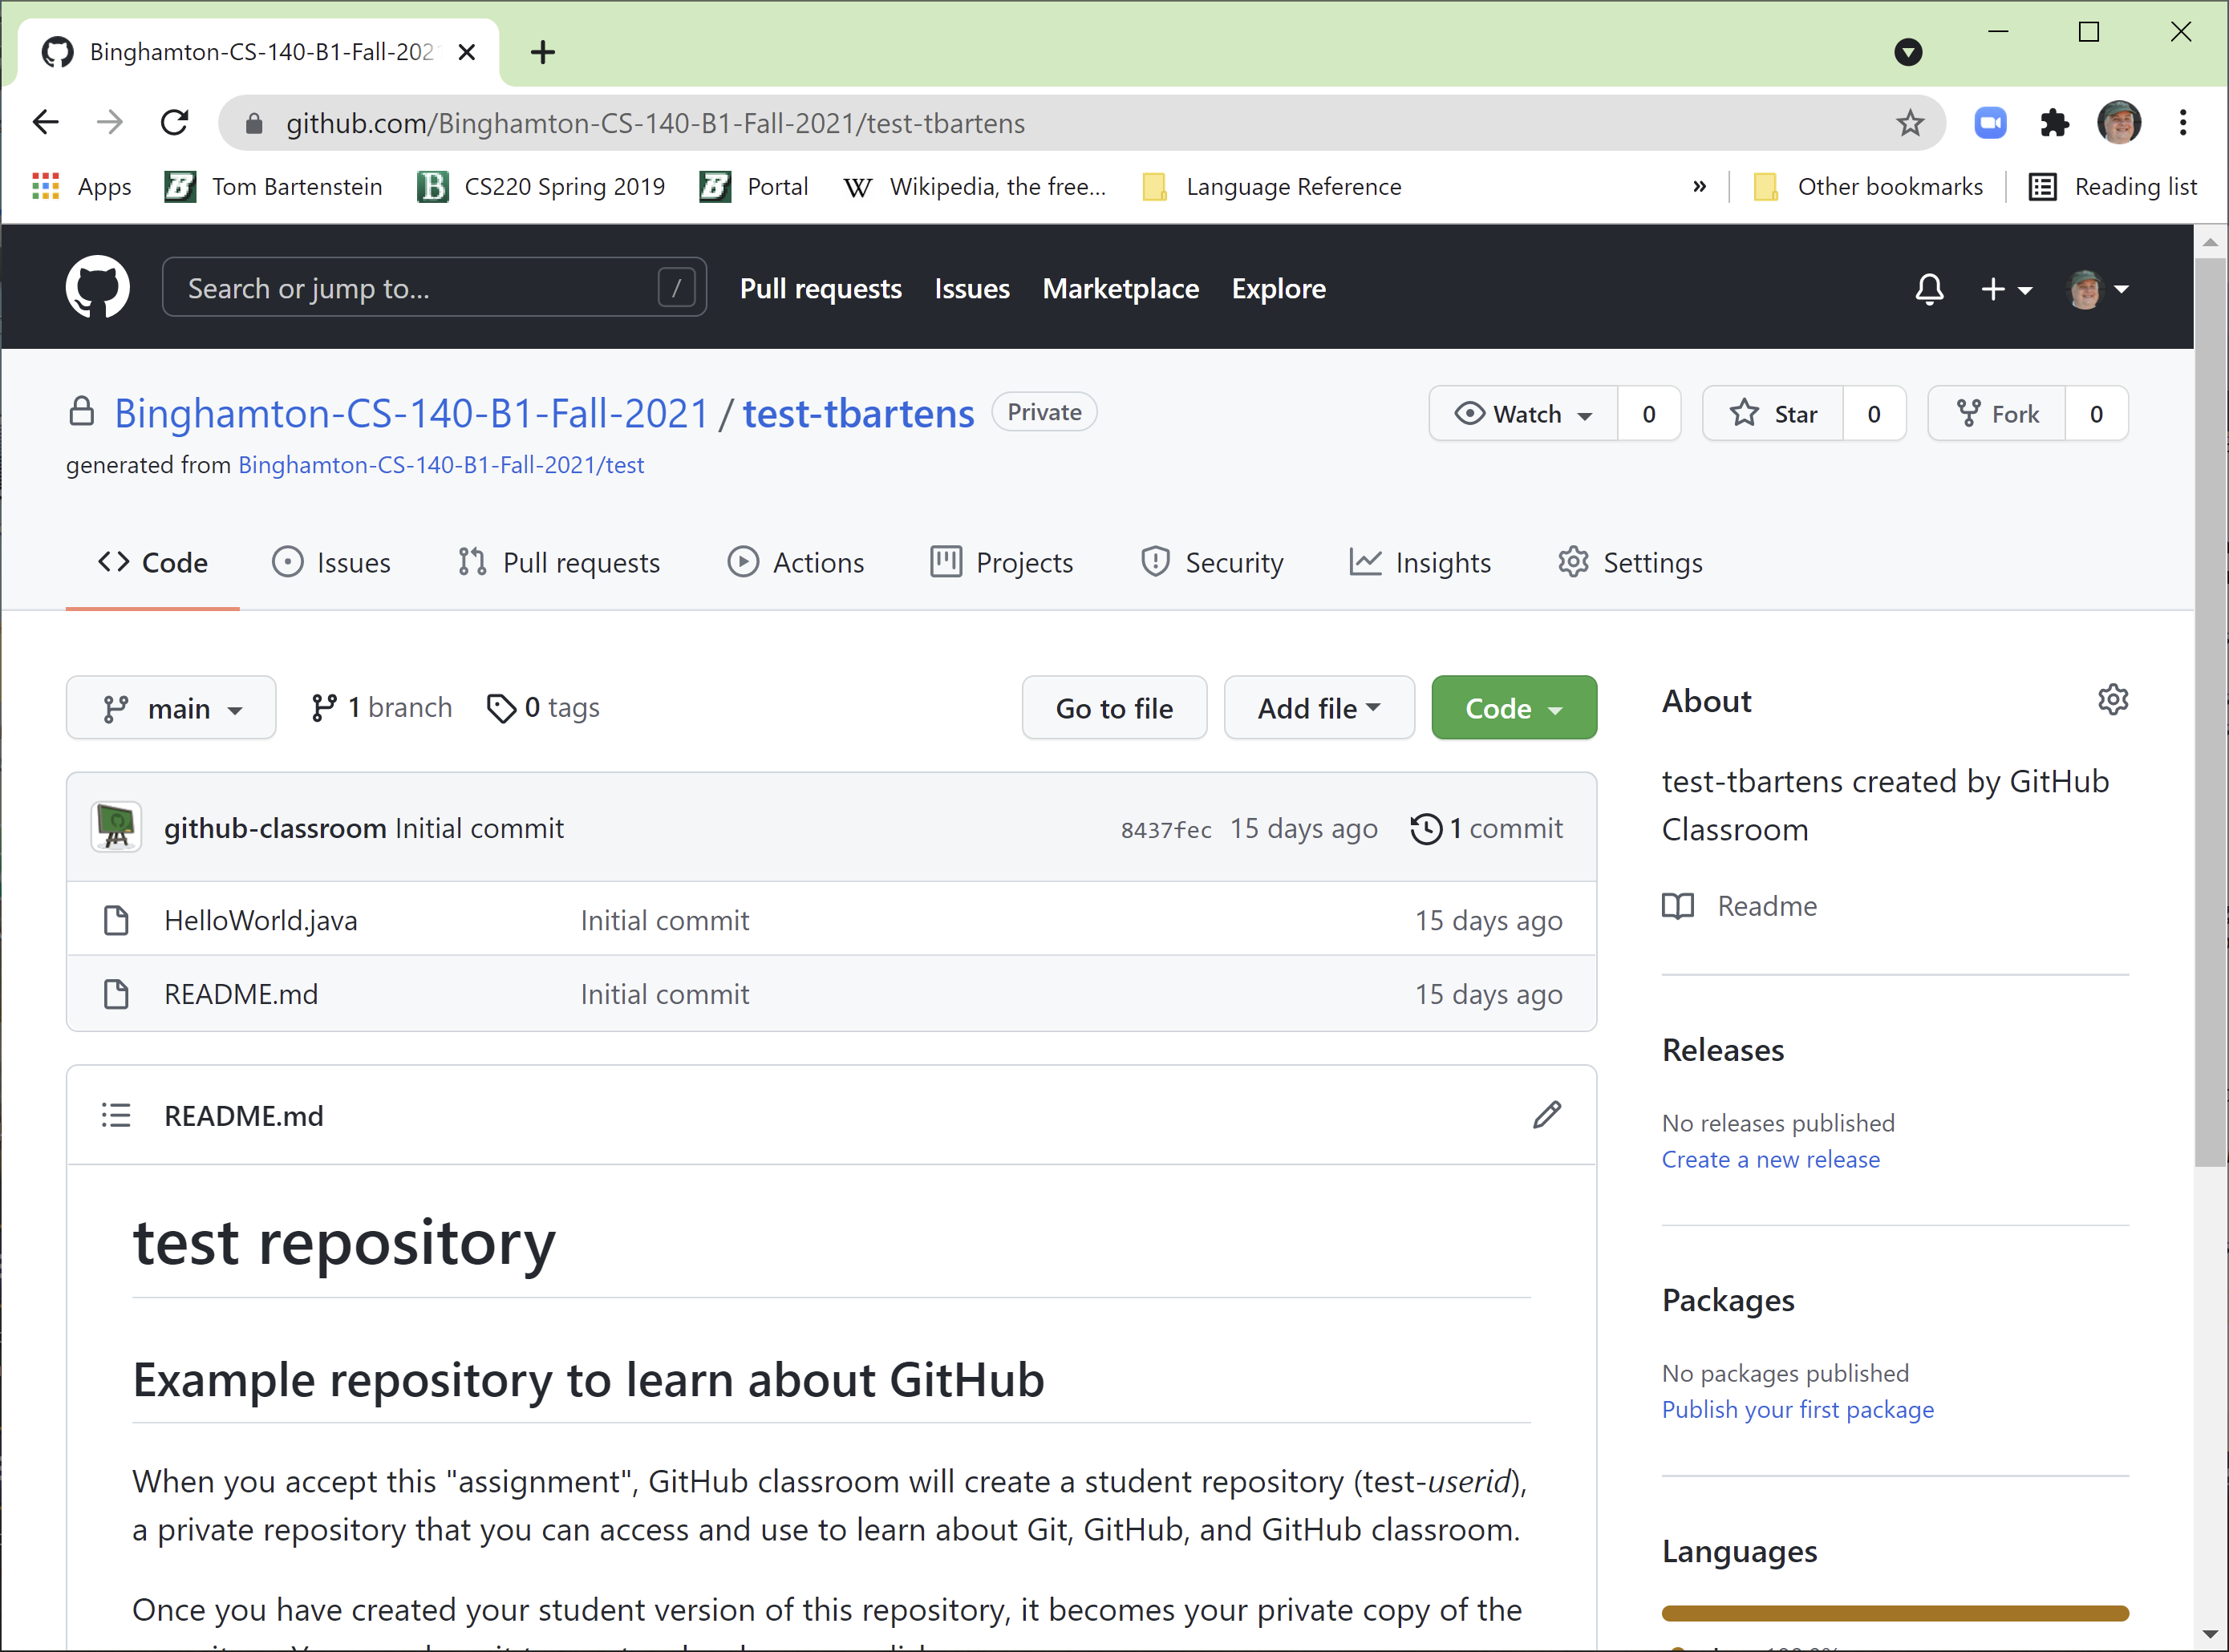
When you open a view of your repository in the web, you are looking at the cloud version of your repository, as in the picture on the left. The upper left of the screen has links to the organization (class) you belong to, the repository, and the repository used to initialize your private repository. Under that are several tabs, with the leftmost tab called "Code" highlighted. This is the tab we will use almost exclusively.
In the "Code" tab the top line is a header line that talks about git branches and tags (we don't need to worry about those for this class) and has a green "Code" button which I describe below.
Under the header line is a line that shows the current committed version of the repository, including the comment used when the version was committed, an abbreviate (first seven digits) commit hash code for the current version, and an "n commit(s)" hyperlink to see other versions, where n is the number of commits (versions) of that repository. The "n commit(s)" hyperlink is described below.
Under the version line, you will see the list of files in the repository, including any java code provided by the instructor or added by you, once you commit new code files. Each file name is a hyperlink that links to a browse of that file.
The last thing in the "Code" tab is a display of the "README.md" file. By default, you will see a formated display of the README.md file, which usually contains instructions on how to complete the lab or assignment provided by the Professor.
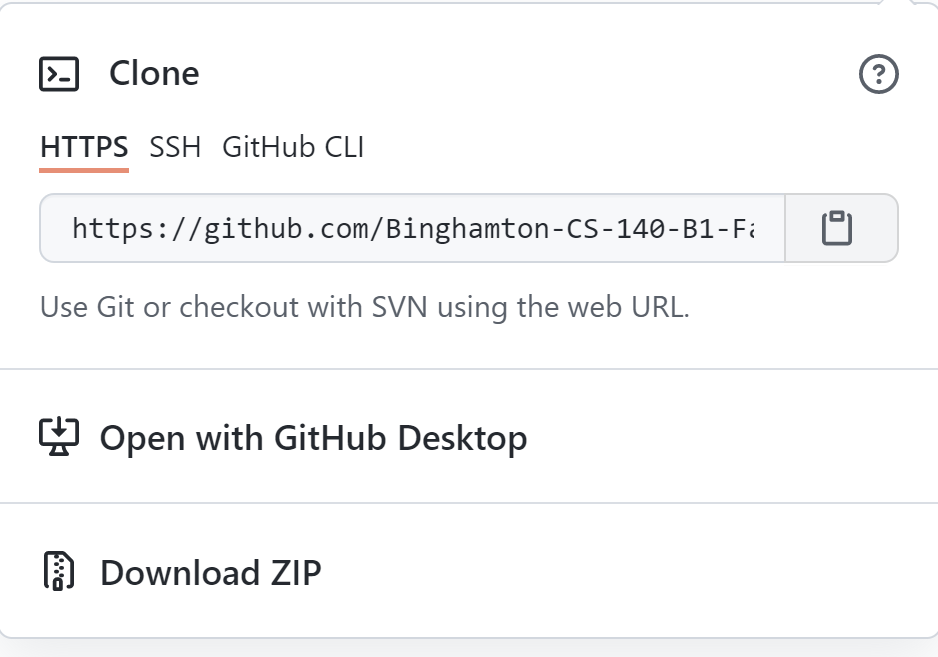
If you click on the green "Code" button in the header line, you will get a "Clone" Popup that looks like the picture on the right. The Clone popup has tabs, and the HTTPS tab is selected by default. Underneath, when the HTTPS tab is selected, is the URL associated with this repository. Click on the clipboard icon to copy that URL to your cut/paste buffer. This is the URL that you will need to clone your repository.
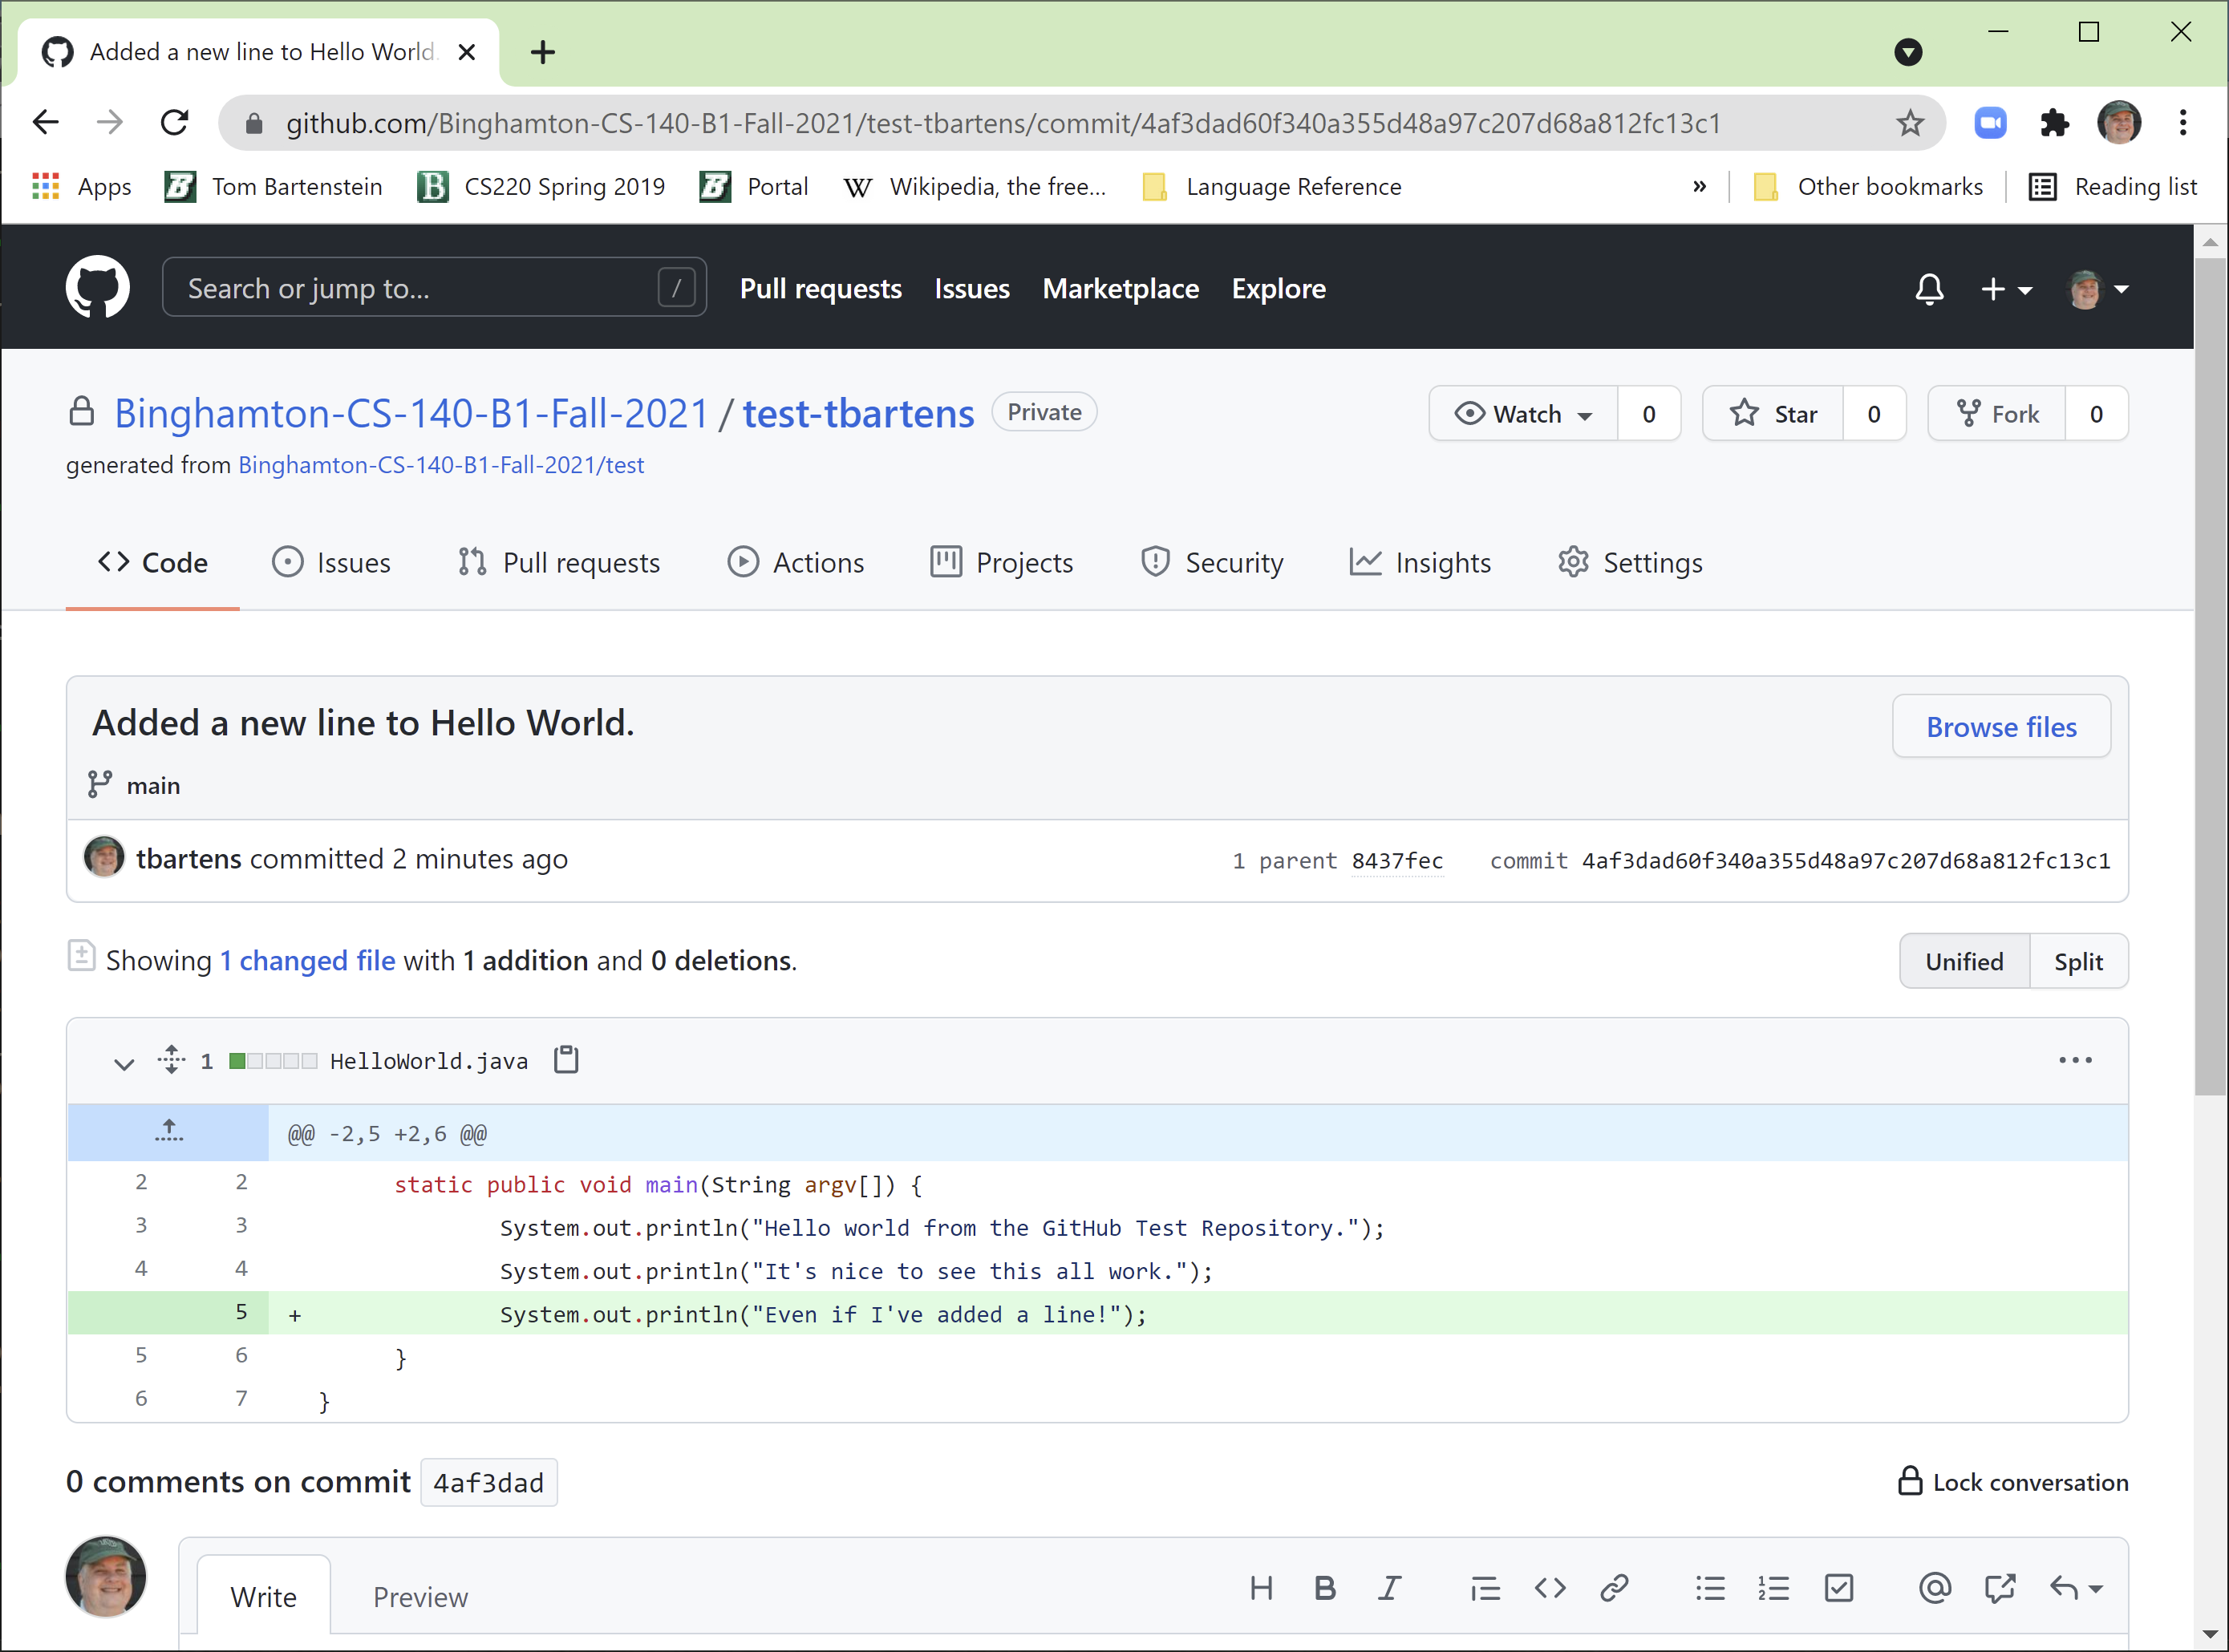
If you click on the "n commit(s)" link in the version line, you will see the history of this repository, showing each committed version of that repository. Each version is described using the person making the commit, the comment used when the commit was made, the time of the commit, and an abbreviated commit hash code. The abbreviated commit hash code is a hyperlink to show the details of that version of code. You can use this link to go back to earlier versions. The picture on the left is what you see when you click on the an abbreviated commit hash code.
When you select an abbreviated hash code, the screen changes to show the comment specified when the commit was made, the abbreviated and full commit hash code, the files that changed from the previous commit, and the details of those files showing insertions and deletions. At the bottom of the screen, you can leave a comment on that version (but I've never used this feature. It's more useful in a team environment.)
When you look at your repository using a web browser, you are looking at the master copy of your repository. You will need a local copy of the repository on disk in order to edit, compile, and test any changes to the repository. You make a local copy of your repository by cloning it.
Clone your repository by open a command line window on the machine where you want to create a cloned copy of the repository. Then run the command git clone URL, where URL is the URL that describes your repository. You can get this URL by looking at your repository in the web browser, and clicking on the green "Clone or Download" button.
When you hit enter, Git may ask for your git Userid and password. Once you enter these, git will make a sub-directory of the current directory named with the repository name. If you "cd" to this sub directory (make it your current directory), then you will see all of the files in that directory. You may edit these files, compile them, and test them in your local repository. Remember, you are updated the local cloned version of the repository, not the master copy.
See git clone for complete documentation of the git clone command.
Git keeps track of a specific list of files. If you create new files in a cloned repository, Git does not know about those files. You need to perform a special action to add those files to your repository. This is done by using the command git add file(s) where file(s) is the full file name of a specific file or list of files that you want Git to include as part of your repository.
See git add for complete documentation of the git add command.
You can use the git status command from your local repository to check the current status of your repository. The git status command will tell you:
See git status for complete documentation of the git status command.
Once you have made and tested all the changes to your repository (including adding files using git add if there are new files), use the git commit -a -m"commit comment" command to indicate that you are happy with your changes and you intend to move those changes to the master repository. The commit comment is a line of text that you want to associate with these changes so you can remember why you made those changes. The "-a" flag tells the commit command to commit anything that has changed. (If you don't specify the -a flag, then you need to include the names of all the changed files on the git commit command line.) You may want to run the "git status" command after running git commit to make sure everything has been committed correctly.
Remember, the git commit command does not update the master repository. You are only committing the changes in the local version of the repository. You still need a git push command to copy those committed changes to the master repository.
See git commit for complete documentation of the git commit command.
Once you have committed changes to your local repository, the next step is to copy those changes to the master repository. This can be done using the git push command. The git push command will copy any committed changes from the local copy of the repository and copy those changes to the master version of the repository. After you complete a git push, you may want to look at the master version of the repository on the web and make sure the changes you expected are reflected in the master version. You may have to hit the "refresh" button in your browser to see those changes, and GitHub warns that sometimes it takes up to 10 minutes for those changes to get reflected, although usually, changes seem to occur almost immediately.
You can also use a git status command to make sure you changes have been pushed to the master.
See git push for complete documentation of the git push command.
Use the command git rev-parse HEAD to get the full 40 hex digit commit hash code for the current version of your repository. You will need to paste the commit hash code into Brightspace when submitting this repository. The commit hash code also appears on the web browser view of the repository in the cloud.
See git rev-parse for complete documentation of the git rev-parse command.
Most of the time, we will only be using a single local version (clone) of a repository, but if you ever have occasion to have multiple local versions of a repository, and you use one local version to commit and push changes to the master, then the second copy of the repository will not reflect those changes. In this case, when you want to work on the second version of the repository, start off with a git pull command. The git pull command tells git to pull any changes in the master repository that have not been made to the local copy into the local copy.
If you don't remember to do a git pull in the second copy of your repository, and start making changes to the second copy, those changes could conflict with the changes made to the master, and could cause problems. To avoid these problems, it's best to always do a git status at the start of a session, and do a git pull if there are any changes to the master that need to be propagated locally when you are using multiple clones of a repository.
See git pull for complete documentation of the git pull command.